はじめに
InputSystem を使ってCinemachine の FreeLook Camera を操作できるようにする方法と、Camera が障害物を避けるようにする設定について説明します。
InputSystem はすでにインストールされているものとして説明します。InputSystem のインストールおよび設定方法は、以前の記事を参照してください。
【Unity】InputSystemを使ってキャラクターの移動を実装する【2023年版】
Cinemachine のインストール
メニューバーの Window から PackageManagerを選択して、PackageManager を起動します。Packages の選択肢から Unity Registry を選択します。
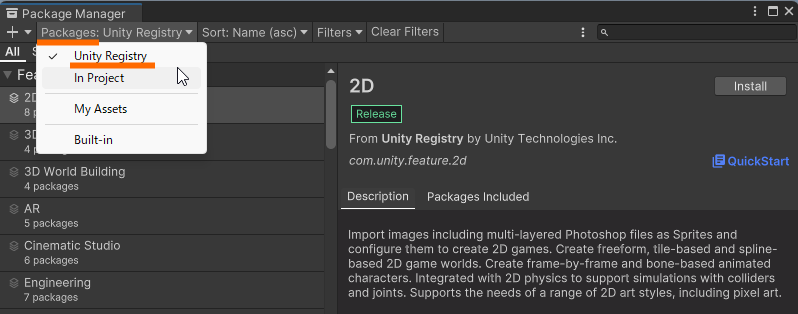
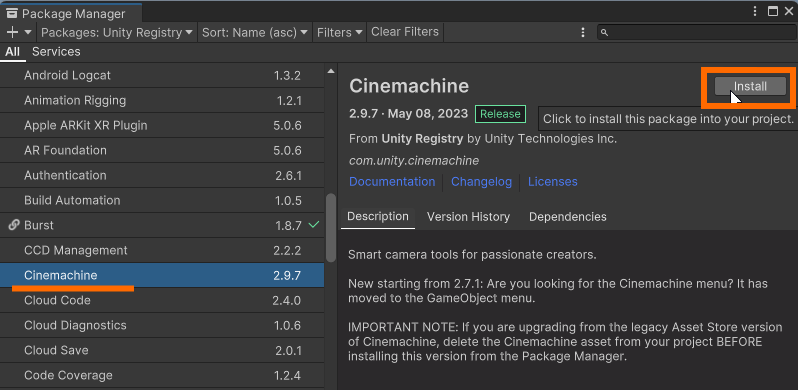
左の一覧からCinemachine を選択して、Install ボタンを押します。
Player の下準備
Player の Prefab の名称変更と Free Look Camera の注視点の作成を行います。
プレイヤーキャラクタの名前の変更
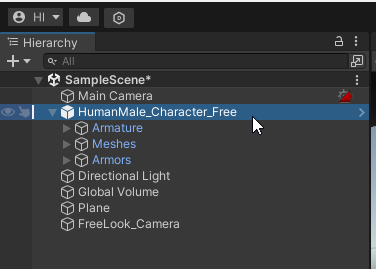
プレイヤーが操作するキャラクターの名称がHumanMale_Character_Free だと分かりづらいので、Player に名前を変更します。
HumanMale_Character_Free の初期状態からいくつかコンポーネントを追加しているので、Prefab に反映します。Hierarchy で Player を選択して、Inspector のPrefabのところで Overrides を押します。
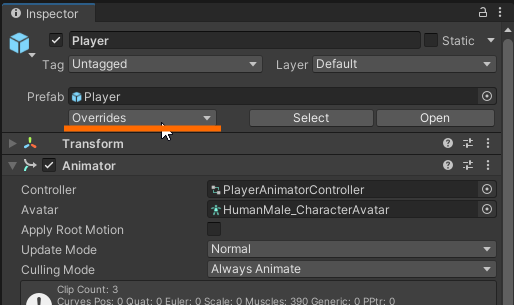
その状態で Apply All をボタンを押して、変更を Prefab に反映します。

Player Prefab の作成
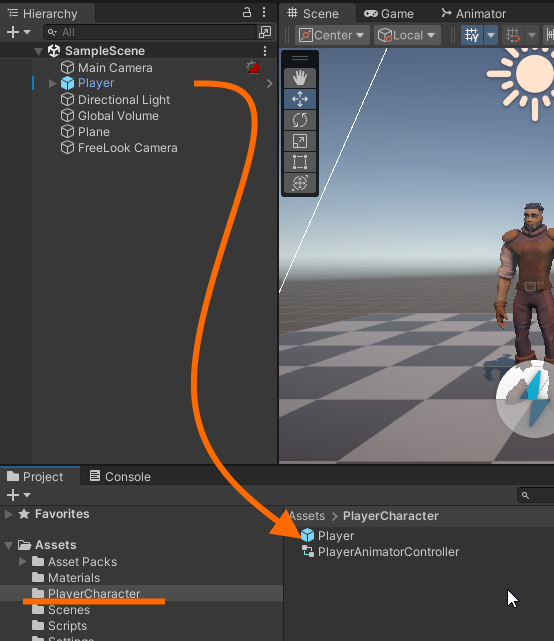
ここまで変更を加えた Player を改めて Prefab化します。
Hierarchy でPlayer を選択し、Project タブの Assets/PlayerController の中にドラッグアンドドロップします。
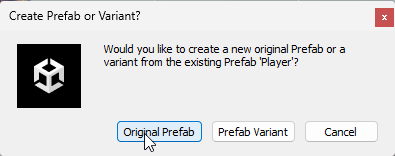
どのような Prefab にするか聞かれるので、 Original Prefab を選択します。
FreeLook Camera の注視点の作成
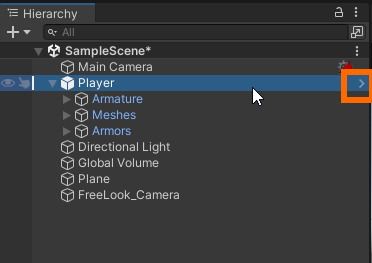
Hierarchy の Player の > を押してPrefab の編集画面に入ります。
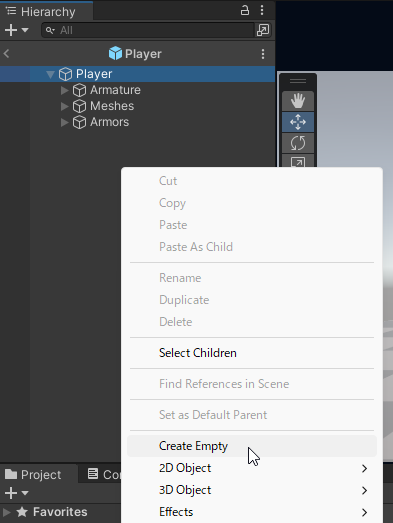
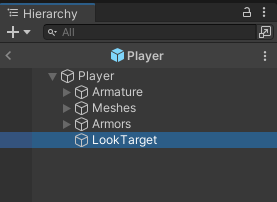
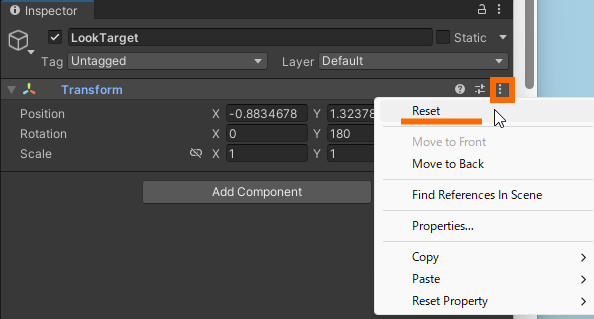
Playerを選択した状態で右クリックして、Create Empty で空のゲームオブジェクトを作成します。名前を LookTarget にします。
LookTarget を選択した状態で、Inspector の Transform を見ると初期位置がずれていることがあるので、三点リーダーから Reset を行います。
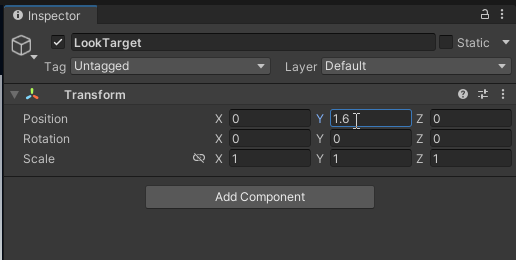
その後、y座標だけ 1.6 を入れてキャラクターの首くらいの位置に合わせます。
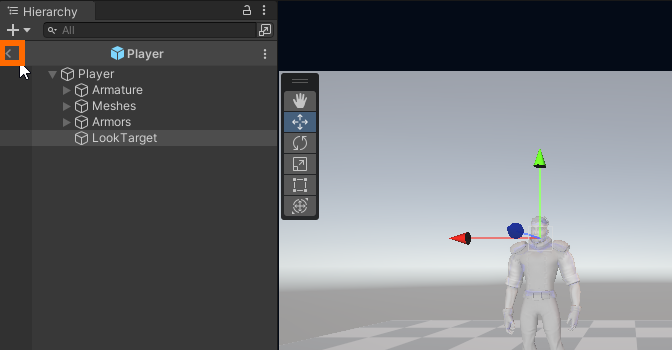
Hierarchy の < を選択して、Prefab の編集画面を抜けます。
Cinemachine の設定
FreeLook Camera の追加
メニューバーで GameObject を選択し、Cinemachine –> FreeLook Camera を選択します。
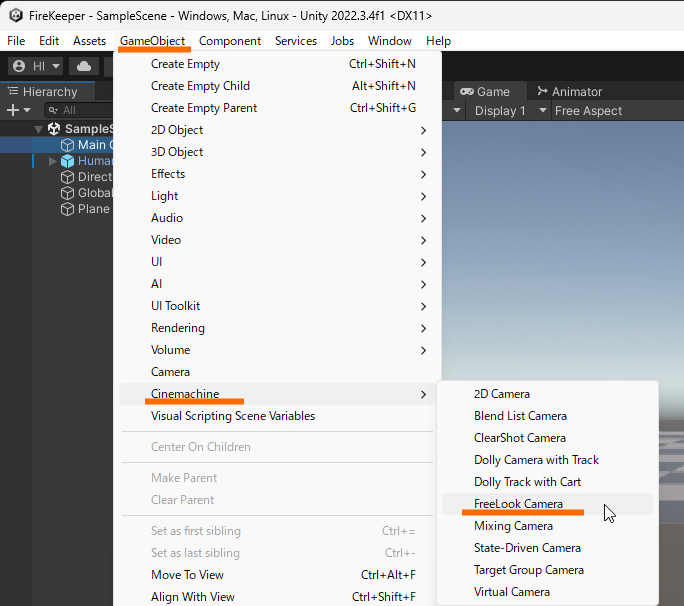
FreeLook Camera が追加されます。名前を変更しても構いません。
FreeLook Camera が追加されたときに、Main Camera のコンポーネントにCinemachineBrainが追加されます。追加した覚えがないからと言って消さないようにしましょう。

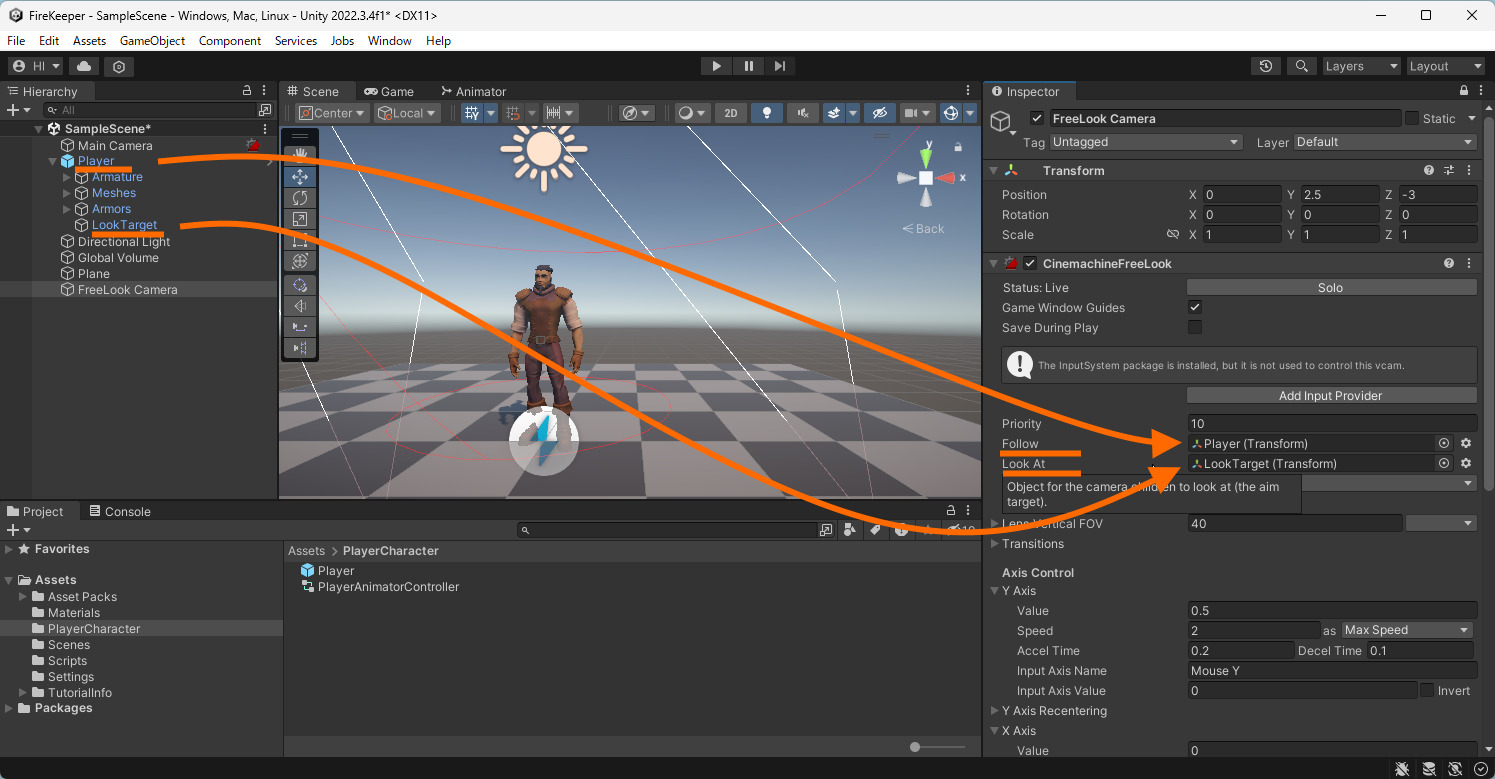
FreeLook Camera に 注視点を設定する
FreeLook Camera が追いかけるゲームオブジェクトを設定します。
Player と LookTarget を FreeLook Camera の Inspector の Follow と Look At に設定します。以下の画像のようにドラッグアンドドロップするか、⦿を押して一覧から選択します。
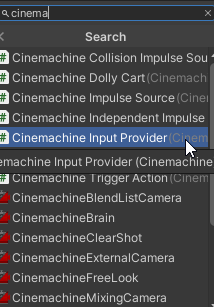
FreeLook Camera に Cinemachine Input Provider を追加する
Cinemachine の FreeLook Camera は、Input System の入力を直接受け取れないため、Cinemachine Input Provider スクリプトを追加します。
FreeLook Camera の Inspector で、Add Component ボタンを押して、検索窓に cinema くらいを入力すると Cinemachine Input Provider が見つかると思いますので、選択します。
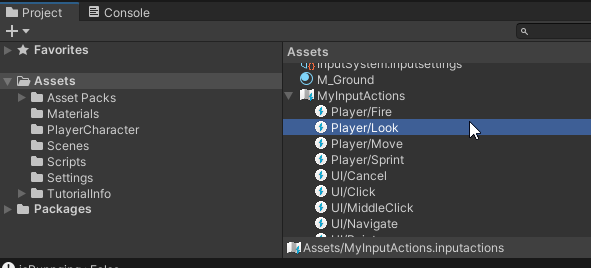
Project タブのAssets 直下にある MyInputActions の中の Player/Look をCinemachine Input Provider の XY Axis にドラッグアンドドロップします。Z Axis は None のままで問題ありません。
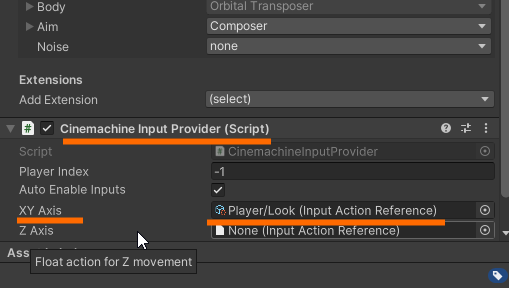
これで、Gamepad の右スティックでカメラが操作できるようになります。
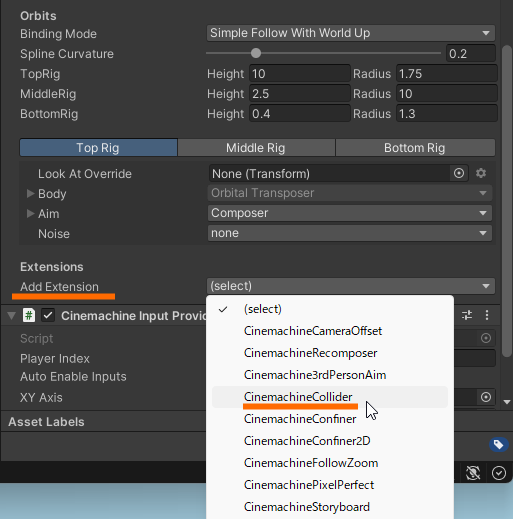
Camera に Collider を付ける
カメラが壁を貫通しないようにするために、コライダーを付けます。
FreeLook Camera のコンポーネントの一番下、Extensions の Add Extensions の(select) から CinemachineCollider を選択します。
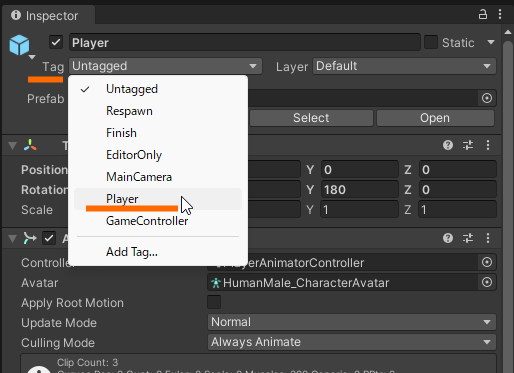
Ignore Tag で Player を選択し、 Player のタグが付いているオブジェクトを無視するように設定します。
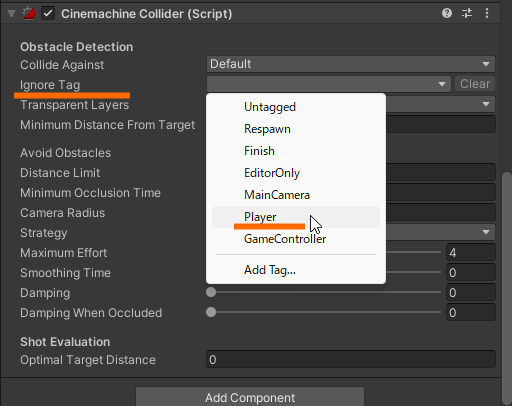
Player 側のTag も Player に設定します。
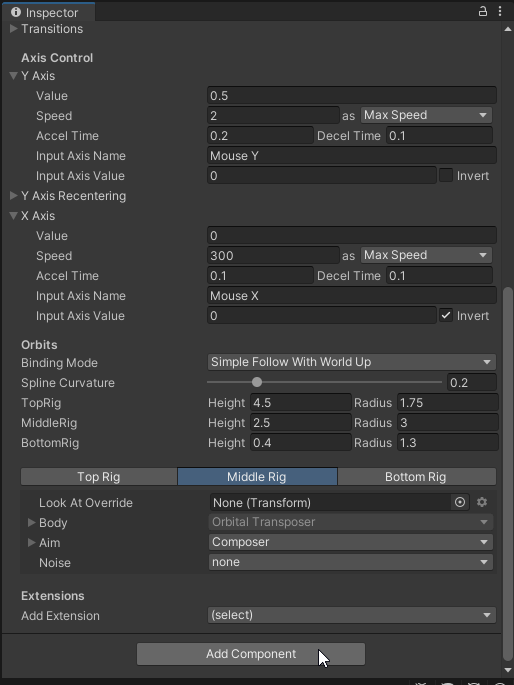
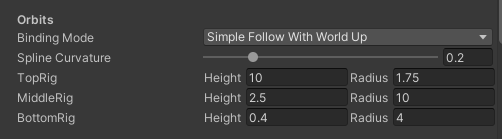
FreeLook Camera の設定
今回は基本的にデフォルトの設定のまま使いました。
Orbits のところだけ以下のような値に変更しています。
スクリプトの変更
PlayerMove.cs の左スティックをカメラの方向を考慮した移動になるよう修正します。
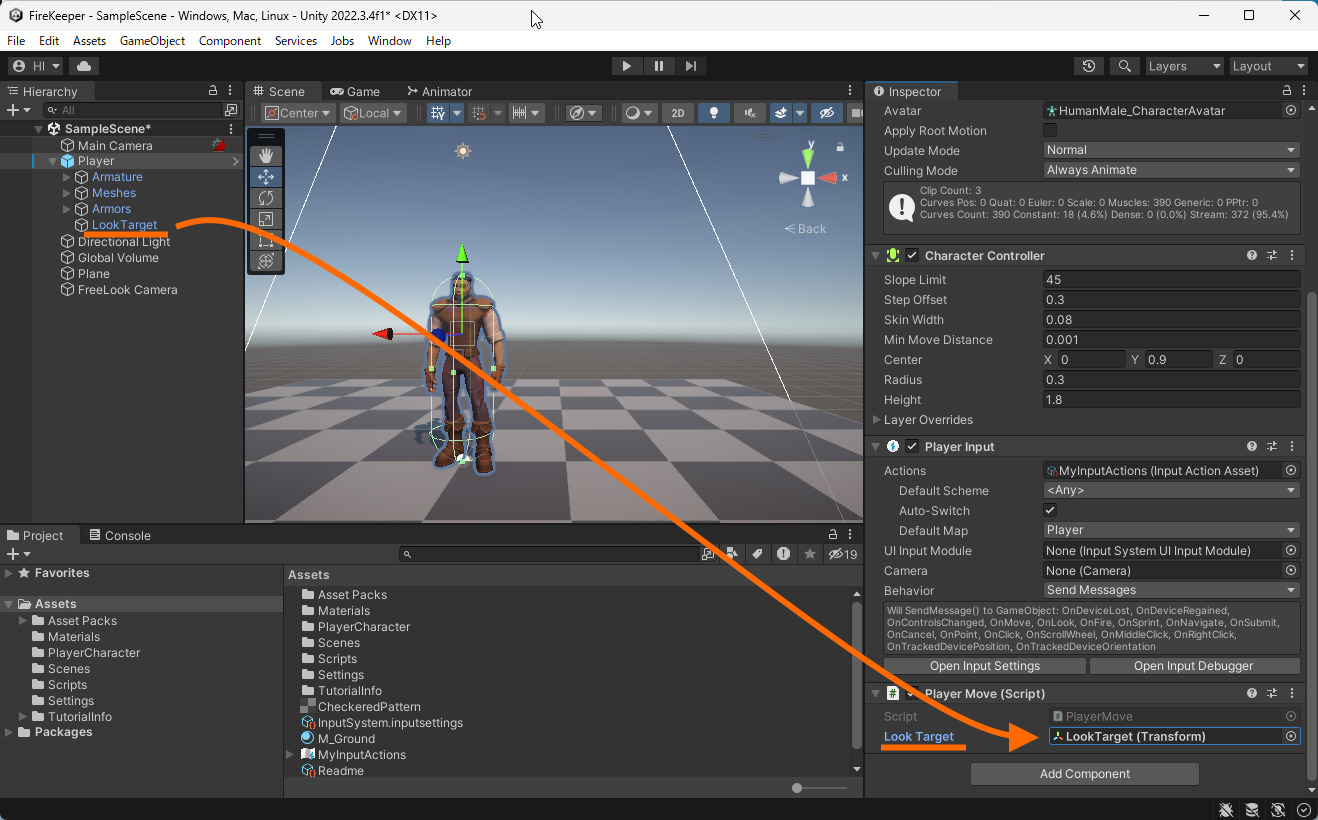
スクリプトを新しいものに差し替えたら、Look Target を設定します。
スクリプトの主な変更は、以下の場所になります。
    void Update()
    {
        var velocity = Vector3.zero;

        // 方向キーの入力があったら、その向きにキャラクターを回転させる
        if (input.magnitude != 0)
        {
            Vector3 playerDirection = Vector3.Normalize(new Vector3(input.x, 0, input.y));
            Vector3 cameraDirection = lookTarget.position - mainCamera.transform.position;
            cameraDirection.y = 0;
            cameraDirection.Normalize();

            // カメラの向きに、スティックの向きを掛け合わせ、キャラクターをスティックの方向に向かせる
            Quaternion characterTargetRotation = Quaternion.LookRotation(cameraDirection) * Quaternion.LookRotation(playerDirection);
            transform.rotation = Quaternion.RotateTowards(transform.rotation, characterTargetRotation, rotationSpeed * Time.deltaTime);
        }
カメラの向きを計算し、それを方向キーの入力と掛け合わせて、キャラクターがスティックの方向に向くようにしています。
変更箇所は、これ以外に、カメラの位置を取得するための変数の定義などもあります。